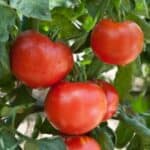
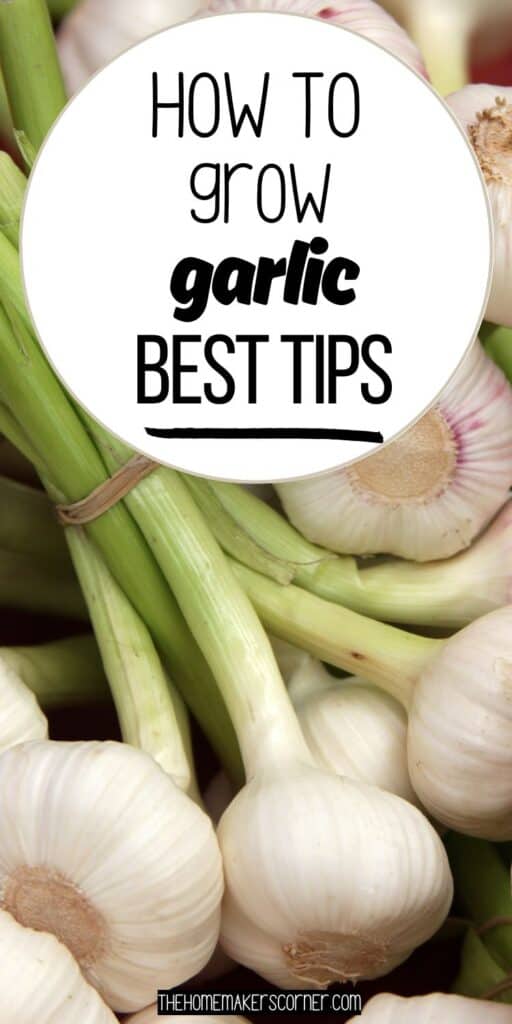
Growing garlic is easier than you might think, even if you’re new to gardening. All you need to do is plant garlic cloves in well-drained soil during the fall, keep them watered, and give them plenty of sun. With just a bit of care, you can soon enjoy fresh, flavorful garlic right from your garden.
This post may contain affiliate links.
Garlic comes in different types, and choosing the right variety for your climate can make a big difference in how well it grows. You’ll also learn how to plant, care for, and harvest your garlic to get the best bulbs possible. This simple guide will help you grow garlic step-by-step, so you can enjoy cooking with homegrown garlic all year long.
Selecting the Best Garlic Varieties
Picking the right garlic can make your growing experience easier and more rewarding. Different types offer distinct flavors, growing needs, and resistance to problems. Knowing these details helps you choose garlic that fits your climate and taste.
Hardneck vs Softneck Garlic
Hardneck garlic usually grows well in cold climates. It has a strong taste and produces a flower stalk called a scape. You can eat the scapes too. Hardneck types have larger cloves but fewer per bulb. They are easier to peel, which many gardeners like.
Softneck garlic grows better in warmer places. It has more cloves in each bulb but smaller in size. This kind is the type you often see in stores. Softneck garlic stores longer, making it good if you want fresh garlic over many months.
| Feature | Hardneck Garlic | Softneck Garlic |
|---|---|---|
| Climate | Cold | Warm |
| Clove Size | Larger | Smaller |
| Clove Number | Fewer | More |
| Flavor | Strong, bold | Mild |
| Storage | Shorter shelf life | Longer shelf life |
Choosing Disease-Resistant Options
Some garlic varieties resist common diseases like white rot and nematodes better than others. Choosing these helps protect your crop without needing many chemicals. Varieties like ‘Music’ and ‘German Red’ hardneck types show good resistance.
You can also look for garlic labeled as disease-resistant at local nurseries. Don’t plant garlic in the same spot each year to reduce disease buildup in soil. Good soil drainage and clean gardening tools help keep your garlic healthy too.
Heirloom and Specialty Garlic Types
Heirloom garlic are older, traditional varieties kept over time. They often have unique flavors and colors. If you want to try something different, heirlooms like ‘Chesnok Red’ or ‘Porcelain’ might be fun.
Specialty garlic includes varieties prized for certain tastes or looks. You might find purple skin, large cloves, or mild flavors. These often require careful climate matching but can make your garden stand out.
Trying heirloom and specialty types gives you a chance to taste rare garlic and enjoy a diverse harvest. Just check which ones grow well where you live before planting.
Preparing Your Soil for Planting
To grow garlic well, you need to create the best soil conditions before planting. This means checking your soil’s health, finding the right spot with enough sun, and making sure water drains well. These steps help your garlic bulbs grow big and strong.
Soil Testing and Amendments
Start by testing your soil’s pH. Garlic prefers a pH between 6.0 and 7.0. You can use a simple soil test kit from a garden store or send a sample to a lab.
If your soil is too acidic (below 6.0), add lime to raise the pH. If it’s too alkaline (above 7.0), sulfur can help lower it.
Next, add organic matter like compost or well-rotted manure. This adds nutrients and improves soil health.
Finally, mix in some balanced fertilizer with nitrogen, phosphorus, and potassium. This helps garlic grow strong roots and big bulbs.
Ideal Location and Sunlight
Choose a spot in your garden that gets 6 to 8 hours of direct sunlight daily. Garlic needs plenty of light to produce healthy bulbs.
Avoid places where onions, garlic, leeks, or similar plants grew recently. Rotating crops prevents disease buildup in the soil.
Pick a flat or slightly raised area to keep soil conditions stable. Garlic doesn’t like to sit in cold, wet low spots.
Make sure the spot has good air circulation. This reduces the risk of fungus and other plant diseases.
Improving Drainage and Soil Texture
Garlic prefers loose, well-draining soil. If your soil is heavy clay, mix in materials like sand or compost to improve texture.
Good drainage stops water from pooling around the bulbs, which can cause rot.
You can also till or dig your soil deeply, about 6 to 8 inches down. This loosens the soil so roots can grow easily.
If your soil drains too quickly, add organic matter to help it hold moisture. Garlic bulbs need consistent but not excessive moisture to develop well.
Planting Garlic Bulbs
To grow garlic successfully, you need to plant the bulbs at the right time, prepare the cloves properly, and place them at the correct depth and spacing. These steps help ensure healthy growth and a good harvest.
Timing and Seasonal Considerations
The best time to plant garlic is in the fall, about six to eight weeks before the ground freezes. This gives the garlic time to develop roots before winter. Garlic needs cold weather to grow well, so planting in the fall helps the bulbs get the chilling period they require.
If you live in a warmer climate where the ground may not freeze, plant garlic when the soil temperature is below 70°F. Avoid planting in the spring unless you keep the bulbs cool over winter. Fall planting usually results in stronger garlic plants and bigger bulbs.
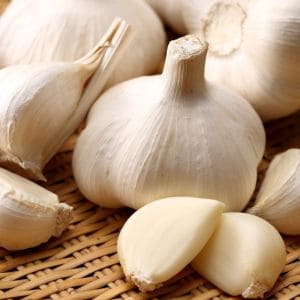
How to Separate and Prepare Cloves
Start by breaking apart a whole garlic head into individual cloves. Choose the biggest and healthiest cloves for planting. Smaller cloves grow smaller bulbs and should be used for cooking instead.
Avoid damaging the cloves’ skins as you separate them. Do not peel the cloves before planting because the skin protects them from pests and diseases. Handle the cloves gently throughout the preparation process for best results.
Depth and Spacing Guidelines
Plant each clove pointed side up, about 2-3 inches deep in loose, well-drained soil. Plant cloves 6 inches apart to give each bulb enough room to grow. If you plant too close, the garlic bulbs might stay small.
Cover the cloves with soil and press lightly to remove air pockets. Adding a layer of mulch helps keep the soil moist and protects cloves over winter. Make sure your soil drains well to avoid rot.
Watering and Fertilizing Garlic
To grow healthy garlic, you need to keep the soil moist but not wet. Your garlic also needs the right nutrients at key times. Using mulch can help keep moisture steady and protect your plants.
Proper Watering Schedule
Water your garlic regularly but avoid overwatering. Garlic likes moist soil, especially during bulb formation. Water about 1 inch per week, more if the weather is hot and dry.
Stop watering about two weeks before you plan to harvest. Too much water late in the season can cause the bulbs to rot.
Check the soil often. It should feel damp, not soggy. If the leaves start turning yellow or limp, you might be watering too little or too much.
Nutrient Requirements
Garlic is a heavy feeder, so it needs plenty of nutrients. When you plant, add a balanced fertilizer or compost to give the roots a good start.
Midway through the growing season, feed your garlic again with a nitrogen-rich fertilizer. This helps the leaves grow strong, which supports big bulbs.
Avoid over-fertilizing after this stage because it can slow bulb development. Look for fertilizers with labels like 10-10-10 or high nitrogen for best results.
Mulching for Moisture Retention
Apply mulch around your garlic plants to keep the soil moist and reduce weeds. Use straw, shredded leaves, or grass clippings.
Mulch helps stop water from evaporating too fast and keeps the soil cool in hot weather. It also protects garlic from temperature swings.
Spread a 2-3 inch layer but keep mulch away from the garlic stems to avoid rot. Replenish the mulch if it thins out during the season.
Maintaining Healthy Garlic Plants
To keep your garlic plants strong, you need to manage weeds carefully and watch your plants closely. These two actions help your garlic get enough nutrients, water, and sunlight without competition or harm.
Weed Control Techniques
Weeds compete with garlic for water, light, and nutrients. To control them, pull weeds by hand regularly, especially when they are small. Avoid using strong herbicides, as garlic plants are sensitive.
Mulching around your garlic helps stop weed growth. Use straw, leaves, or grass clippings in a 2-4 inch layer. Mulch keeps the soil moist and cool, which garlic likes, while blocking weeds from growing.
Check your garlic bed often. If you catch weeds early, they are easier to remove and won’t stress your plants. Keeping the area clean around garlic will increase your chances of a good harvest.
Monitoring Growth and Development
Watch your garlic closely as it grows to spot any problems early. Healthy garlic leaves should be green and firm. Yellowing or wilting leaves can signal pests, disease, or too much water.
Check for bugs like onion thrips or fungal spots on leaves. Remove affected leaves and consider using natural pest controls if you see an infestation.
Make sure the soil stays evenly moist but not soggy. Garlic needs water, especially during bulb formation, but too much water can cause rot.
Keep track of how your garlic is growing by marking the planting date. This helps you know when to start preparing to harvest, usually in mid to late summer when the leaves begin to brown.
Common Pests and Diseases
Garlic can face a range of pests and diseases that affect its growth and yield. Knowing how to spot these problems early and manage them well is key to a healthy harvest. You will learn how to identify common pests, prevent diseases, and use natural methods to protect your plants.
Identifying Garlic Pests
Watch for pests like onion thrips, small insects that feed on leaves and cause silvery spots. Dry bulb mites live in the soil and attack bulbs, making them soft and shriveled.
Onion maggots are larvae that burrow into cloves, causing decay. You might see red spider mites on the undersides of leaves, causing yellow spots and webbing.
Look for these signs:
- Leaf discoloration or silvery streaks
- Soft, mushy bulbs
- Webbing on leaves
- Bulbs with holes or rot
Checking your garlic plants regularly will help you catch pest issues early before they spread and harm your crop.
Preventative Disease Management
Garlic diseases mainly come from fungi, bacteria, or viruses. Common ones include white rot, which causes yellowing leaves and soft bulbs, and garlic mosaic virus that makes leaves streaky or twisted.
Prevent disease with these tips:
- Use disease-free seed garlic
- Rotate crops and avoid planting garlic in the same spot for several years
- Remove and destroy infected plants quickly
- Keep soil well-drained and avoid overwatering
Good soil and air drainage reduce the risk of fungal infections. Clean your tools before working with your garlic to stop spread of disease.
Organic Pest Control Methods
To control pests without chemicals, try these natural steps. Introduce beneficial insects like ladybugs to eat thrips and spider mites. Use neem oil spray or insecticidal soap to manage soft-bodied insects.
You can also protect bulbs with row covers that keep pests out while still letting sunlight in. Plant companion plants such as marigolds nearby to repel harmful pests.
Maintain healthy garlic by removing plant debris and rotating crops yearly. Organic methods help keep your garlic safe while supporting the garden’s natural balance.
Harvesting Garlic Successfully
To get the best garlic from your garden, it’s important to know when to harvest, how to dig it up carefully, and how to clean it after harvesting. Timing and gentle handling keep your bulbs healthy and flavorful.
Signs Garlic Is Ready to Harvest
You’ll know garlic is ready when the lower leaves start to turn brown but the upper leaves remain green. Usually, this happens about 7 to 8 months after planting.
Check the garlic bulbs by digging up one or two plants carefully. The cloves should be plump and the skin tight. If the cloves look small or the skin feels loose, the garlic needs more time to grow.
Avoid waiting too long after these signs because the bulbs can split, reducing storage life and flavor.
Best Harvesting Practices
Use a garden fork or spade to loosen the soil around each garlic plant. Be careful not to stab the bulbs when digging. Gently lift the bulbs out of the ground by their stalks.
Avoid shaking the dirt off immediately. Let the dirt dry naturally to avoid cutting the skin or bruising the garlic.
Work in dry weather if possible. Wet garlic can rot more easily.
Post-Harvest Cleaning
Once harvested, brush off excess soil gently but don’t wash the garlic with water. Washing adds moisture, which can lead to mold.
Leave your garlic to cure in a dry, shady, and well-ventilated place for 2 to 3 weeks. This helps the bulbs harden and the flavors fully develop.
After curing, trim the roots and cut the stalks about an inch above the bulb or braid the leaves for storage. Store your garlic in a cool, dry, and dark place to keep it fresh for months.
Curing and Storing Garlic
Once you harvest your garlic, you need to dry it properly and store it carefully to keep it fresh for months. Good curing improves flavor and texture, while good storage helps prevent rotting or sprouting.
Proper Curing Techniques
After pulling garlic from the ground, gently brush off excess dirt but don’t wash the bulbs. Hang the garlic in a well-ventilated, dry spot away from direct sunlight. Ideal conditions are about 60-70°F with low humidity.
Cure garlic for 2 to 4 weeks, allowing the bulbs to dry fully. You’ll know it’s ready when the outer skins are papery and the cloves feel firm.
Avoid curing in a humid place because moisture can cause mold. You can tie garlic in bundles or spread them on a rack. Remember to keep air flowing around the bulbs.
Long-Term Storage Methods
Once cured, trim roots close to the bulb but leave the necks intact for better storage. Cut stalks or braid garlic if you want to hang it.
Store garlic in a cool, dark, and dry place, ideally between 32-50°F. Avoid refrigerators because moisture can cause sprouting or soft spots. Use mesh bags, paper bags, or open containers to allow air circulation.
Check your garlic every few weeks and remove any bulbs that show signs of decay to keep the rest fresh longer.
Preventing Storage Issues
Watch out for mold, sprouting, and soft spots in your stored garlic. These often come from curing or storage problems.
To prevent mold, ensure garlic is fully dry before storing. Avoid plastic bags, as they trap moisture. Use breathable containers like paper or mesh.
If you see sprouts, your garlic is still safe to eat but might have a stronger flavor. Remove any soft or rotten bulbs right away to stop spread. Keep the storage area cool and ventilated to reduce these risks.
Using Homegrown Garlic
Homegrown garlic offers you fresh flavor and the chance to save bulbs for planting later. You can use your garlic in many ways, from cooking to starting new plants next year. Proper handling helps you get the most from your harvest.
Saving Garlic for Next Season
To save garlic for next growing season, choose the biggest and healthiest bulbs. Avoid using small or damaged cloves because they may not grow well.
Cure your garlic bulbs by hanging them in a dry, shady place for about 2-3 weeks. This helps the outer skin dry and protects the cloves inside.
After curing, store garlic in a cool, dry spot with good air circulation. Keep the temperature around 60°F (15°C). Avoid places that are too warm or damp, which can cause bulbs to rot.
Label your saved garlic and plant the largest cloves in the fall for the best chance at a healthy harvest the next year.
Follow my gardening board on Pinterest.
In case you missed it: